这里先从最近看ReactNative文档发现的expo说起,因为使用expo可以直接在ios或者安卓展示ReactNative的效果,门槛突然降低了许多,因此,突发奇想试试做native app。
首先可以按照ReactNative的GetStart配置完环境并完成一个hello world!
总体如果有node和npm的话就以下两步:
npm install -g create-react-native-app
create-react-native-app AwesomeProject
cd AwesomeProject
npm start
然后等出现一个二维码,用手机上的expo App扫码就行,ios和安卓都行哦!
再来上新闻代码,写在文件的app.js里,这里在IOS上做尝试。
先引入之后会用到一些的组件
import React, { Component, PropTypes } from 'react';
import { AppRegistry,RefreshControl,TouchableWithoutFeedback, WebView,ActivityIndicator ,ListView, Text, Image, View, StyleSheet, TextInput, Button, Alert, ScrollView, NavigatorIOS, TouchableHighlight, FlatList } from 'react-native';
第一个主组件,写了一个ios的导航条,内容在main组件里
 export default class Test extends Component {
    constructor(props){
      super(props);
    }
    render() {
        return (
            <NavigatorIOS initialRoute={ {
                component: main,
                title: "头条",
            } } style={ {
                flex: 1
            } }
            ref="navWorkspace"
            />
        )
    }
}
main组件,主要用到了fetch来拉取新闻,在放入ListView组件内,
其中又加了RefreshControl组件来下拉刷新,ListView的onEndReached来控制上拉加载更多。这里有个疑问,用FlatList不能实现上拉加载更多?
class main extends Component {
    constructor(props) {
        super(props);
        this.state = {
            onEndStart: true,
            totalList:[],
            dataSource: null,
            page:2,
            refreshing:false,
        };
    }
    fetchData(){
      return fetch("http://api.dagoogle.cn/news/get-news?page=1").then((response)=>response.json())
    }
    _onRefresh(){
      this.setState({
        refreshing:true
      })
      this.fetchData().then((responseJson)=>{
        var tmp=parseInt(responseJson.data[0].news_id)-parseInt(this.state.totalList[0].news_id)
        if(tmp!=0){
          for(let i=tmp-1;i>=0;i--){
              this.state.totalList.unshift(responseJson.data[i])
            }
          }
          let ds = new ListView.DataSource({
                    rowHasChanged: (r1, r2) => r1 !== r2
                });
        this.setState({
          refreshing:false,
          dataSource:ds.cloneWithRows(this.state.totalList)
        })
      })
    }
    getnews(page){
      return fetch("http://api.dagoogle.cn/news/get-news?page="+page)
            .then((response) => response.json())
            .then((responseJson) => {
                let ds = new ListView.DataSource({
                    rowHasChanged: (r1, r2) => r1 !== r2
                });
                for(let i in responseJson.data){
                  this.state.totalList.push(responseJson.data[i])
                }
                this.setState({
                    dataSource: ds.cloneWithRows(this.state.totalList),
                    onEndStart: false
                })
            })
    }
    componentDidMount() {
        return fetch("http://api.dagoogle.cn/news/get-news?page=1")
            .then((response) => response.json())
            .then((responseJson) => {
                let ds = new ListView.DataSource({
                    rowHasChanged: (r1, r2) => r1 !== r2
                });
                this.setState({
                    totalList: responseJson.data,
                    dataSource: ds.cloneWithRows(responseJson.data),
                    onEndStart: false
                })
            })
    }
    toend(){
      if(!this.state.onEndStart){
        this.getnews(this.state.page);
        this.setState({
          page:this.state.page+1
        })
      }
    }
    goTo(key){
      this.props.navigator.push({
          component: Detail,
          title: '详情',
          rightButtonTitle: '收藏',
          passProps: { title: this.state.totalList[key].title,content:this.state.totalList[key].content,source:this.state.totalList[key].source},
          onRightButtonPress: function() {alert(1)}
      });
    }
    render() {
        if (this.state.onEndStart) {
            return (
                <ActivityIndicator style={ {flex:1,alignItems:'center',height:80} } animating={true}/>
            )
        }
        return (
            <ListView
            refreshControl={
              <RefreshControl
                refreshing={this.state.refreshing}
                onRefresh={this._onRefresh.bind(this)}
              />
            }
            style={ {marginTop:65} }
            dataSource={this.state.dataSource}
            renderRow={(item,sectionId,rowId) =>
              <TouchableWithoutFeedback onPress={this.goTo.bind(this,rowId)}>
              <View style={styles.list_item}>
                <Text style={styles.list_item_font}>
                    {item.title}
                </Text>
                <Image source={ {
                    uri: item.top_image
                } } style={styles.image}/>
              </View>
              </TouchableWithoutFeedback>
            }
            onEndReachedThreshold={150}
            onEndReached={this.toend.bind(this)}
            />
        )
    }
}
之后点击新闻跳转到详情页。下面是详情页的组件
class Detail extends Component{
  constructor(props){
    super(props)
  }
  render(){
    var html="<h3 style='margin-bottom:0'>"+this.props.title+"</h3>"+"<div style='color:gray;margin-bottom:-15;'>"+this.props.source+"</div>"+this.props.content;
    return(
        <View style={ {flex:1} }>
          <WebView source={ {html:html} }/>
        </View>
      )
  }
}
样式的话写在最后StyleSheet组件中,在上面的组件内可以直接用style={styles.xxx}调用样式。
const styles = StyleSheet.create({
    flex: {
        flex: 1,
    },
    list_item1: {
        marginLeft: 10,
        marginRight: 10,
        borderBottomWidth: 1,
        borderBottomColor: '#ddd',
        flex: 1,
        flexDirection: 'row',
        alignItems: 'center',
    },
    list_item: {
        height:80,
        marginLeft: 10,
        marginRight: 10,
        borderBottomWidth: 1,
        borderBottomColor: '#ddd',
        flex: 1,
        flexDirection: 'row',
        alignItems: 'center',
    },
    list_item_font: {
        marginRight: 1,
        flex: 3,
        fontSize: 16,
    },
    image: {
        flex: 1,
        width: 60,
        height: 60,
    }
});
然后就可以
npm start
在手机expo里看到效果咯。
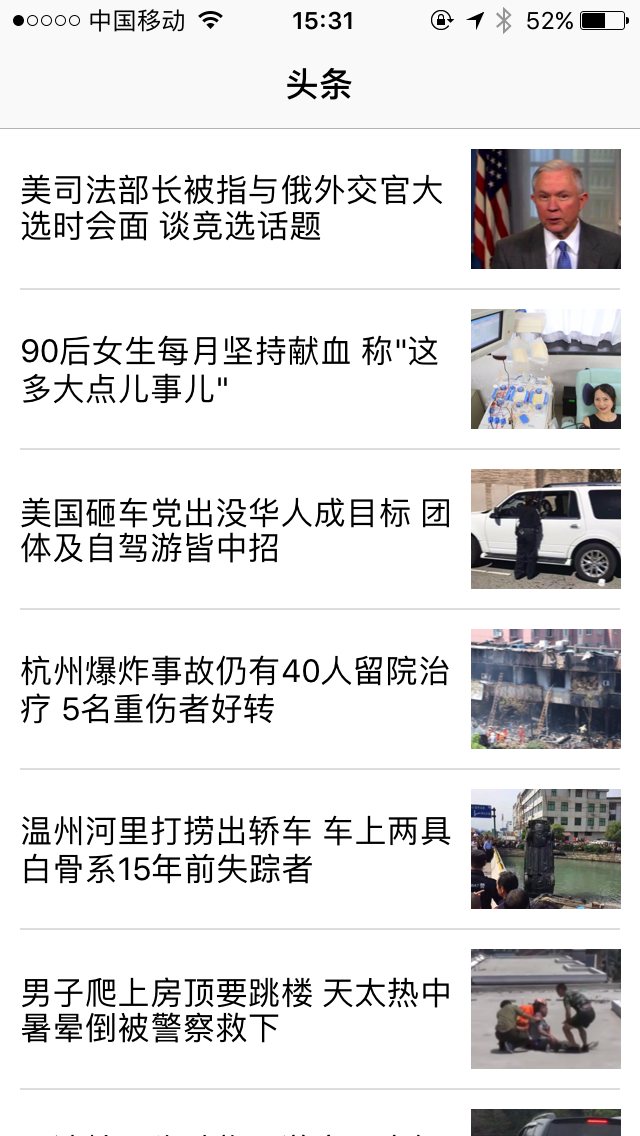
效果展示:
版权声明:本文为原创文章,转载请注明出处和作者,不得用于商业用途,请遵守
CC BY-NC-SA 4.0协议。
赏
 支付宝打赏
支付宝打赏
 微信打赏
微信打赏
支付宝打赏
微信打赏
赞赏一下